The Best Apple Pie Recipe
2014-08-04- Prep Time : 0m
- Cook Time : 0m
- Ready In : 0m
Absolutely Scrumptious
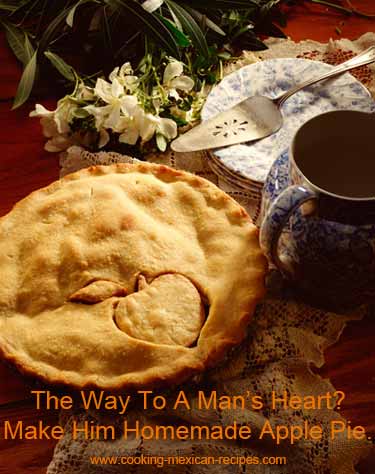
Need an apple pie recipe? This one has served me well for over 20 years. It is a tradition in my family that I make my homemade apple pie every year at Thanksgiving, Christmas, and when ever my husband requests it.
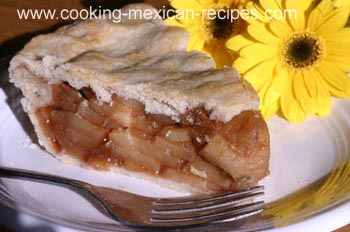 It’s not too sweet although you can adjust that if you like and the juice in the pie is not too gooey like some pies. I use quite a bit of cinnamon and the pie crust is nice and flaky.
I’m really proud of this pie. It really is delicious if I do say so myself and I am happy to share it with you.
I know my husband would say it’s the best apple pie he’s ever had.
Please don’t be afraid to make a homemade apple pie. This is a simple apple pie recipe. I will hold your hand, so to speak, and walk you through the whole process. I’m even including pictures and now a video to help you.
My Homemade Apple Pie Recipe Secret
Do you ever notice some apple pies have a gap or space between the top crust and the filling? Would you like to know the secret to avoid that? All you have to do is cook your apples with all the spices first. Other apple pie recipes don’t tell you that.
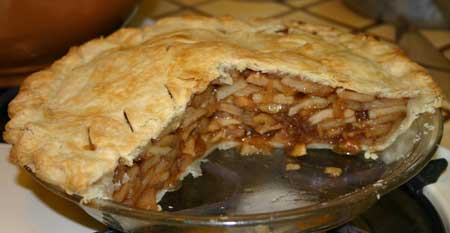
By cooking the apples first, they cook down which means you can get more apples into the pie. Then as the pie cooks in the oven the apples don’t shrink much if at all. With no shrinkage there is not gap or space between the upper crust and the filling.
Which Apples To Use
Newton Pippin apples are my very favorite to use for this apple pie recipe.
They are firm and sparkling with flavor with just the right amount of tartness in my opinion. If you can’t find pippins you can substitute Granny Smith apples. Look for nice firm apples.
Let’s start this easy apple pie recipe with cooking the apples. While they are cooking you can begin the pie crust. What I do is have my husband peel, core and thinly slice the apples while I make the dough.
He recently gave me an apple peeler corer machine so his time spent on this is now minimal. He whizzes through 12 apples in a matter of minutes. It’s truly the coolest little machine. Click here if you would like to get one yourself.
Watch My How-To Video On Apple Pie

Apple Pie Filling
Ingredients:
- 10 -12 newton pippin (preferred) or granny smith apples, peeled, cored, and thinly sliced
- 2 1/2 tsp. ground cinnamon
- 3/4 – 1 cup sugar, depending on how tart the apples are. I usually use an amount inbetween these two measurements
- 1 1/2 tablespoon cornstarch
Directions:
Peel, core, and slice the apples 1/4 inch thick or use the apple peeler corer and place in a pot over low heat.
Mix the cinnamon, sugar and cornstarch in a bowl. Sprinkle the mixture over the apples and stir. Cover, simmer on low and stir occasionally until apples are soft but not mushy. 20 to 25 minutes or more.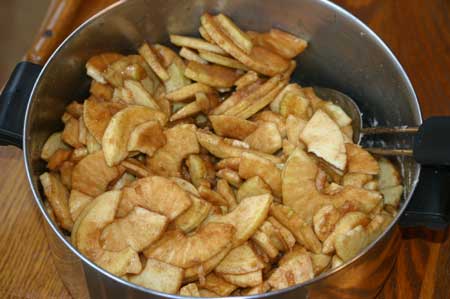
These apples will cook down and all fit in the pie.
While the apples are cooking slowly, it’s time to prepare the pie crust.
Don’t be intimidated by homemade pie crusts. Your family and friends will be impressed if you just follow along with my apple pie recipe.
It’s really easy if you know what to do and what to avoid. I will explain exactly how to do it.
The Pie Crust
Ingredients:
- 2 1/4 cups white flour, sifted twice
- 2/3 cup shortening, chilled
- 1 tsp. salt
- 6 – 8 tablespoons of ice water
- 9 inch pie plate
Step by Step Instructions For A Flaky Pie Crust
There is just something special about a homemade pie crust. You really can tell the difference between one that is homemade and one that is store bought. The flavor and flakiness is so much better.
You could buy a ready made crust and this apple pie recipe will still be good but why not try my crust recipe and make it extra special?
Directions:
Put the 8 tablespoons of water in a bowl, add 4 or 5 ice cubes and put in the refrigerator.
Make sure that your shortening is cool and not room temperature.
To make a flaky crust the shortening needs to be cool so that it doesn’t melt into the flour. I put my shortening in the fridge for 15 – 20 minutes before using.
Double sift the flour. Take a sheet of wax paper and sift 3 cups of flour on to it.
Gently spoon flour into a one cup measuring cup. Level it off with a knife, and place this flour back into the sifter which is sitting in a large mixing bowl.
Continue measuring the other 1 1/4 cups into the sifter in the same way.
Be careful not to pack down the flour. We want it light and fluffly.
Add the salt on top of the flour and sift again into the large bowl.
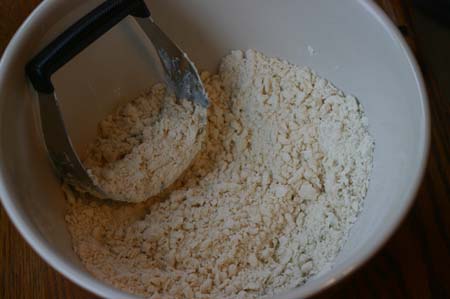
Add the shortening to the bowl. With a pastry blender, cut the shortening into the flour until the particles are about the size of peas.
Now add 4 tablespoons of the ice water all over the dough. Mix lightly and quickly with a fork. Then add one tablespoon at a time and mix again until all the flour is moistened.
If it looks like you need more moisture you can add up to 7 or 8 tablespoons of water.
The mixture should be neither dry and crumbly nor wet and sticky.
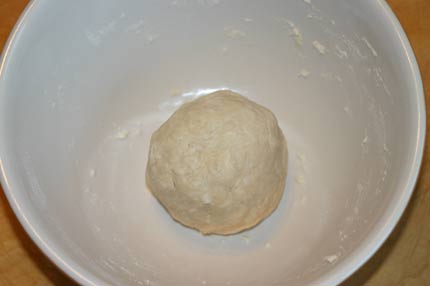
Stir with a fork until it forms a dough and almost cleans the sides of the bowl.
Press the dough into a ball with your hands. For a flaky crust don’t over handle the dough. Just enough to make the dough into a ball.
Cut the dough in half with one half slightly bigger than the other. I use which ever half is larger for the bottom crust.
Place the half for the top crust back in the bowl and cover it with a damp paper towel (use cold water). This will keep the dough from drying out.
Rolling The Dough For the Apple Pie Recipe
I prefer to roll out my dough on a pastry cloth.
The pastry cloth does a great job keeping the dough from sticking and makes it easier to move the dough to the pie plate.
Once I started using a Pastry Cloth to roll pie dough, I never wanted to make a pie without one. It makes the job of making pie crust so much easier. I highly recommend you use one.
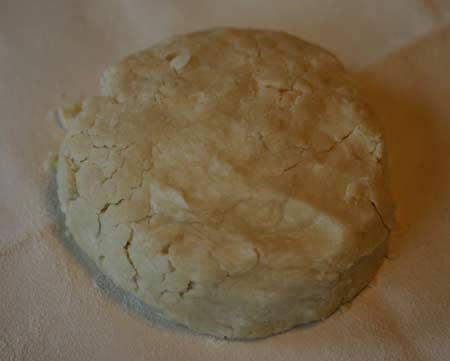
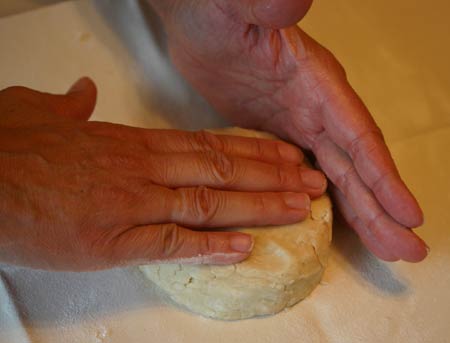
Sprinkle flour lightly over your pastry cloth and place the dough in the center. Push down on the dough with the palm of your hand to flatten it into a circle.
Sometimes the pastry cracks at the edges so push the edges together with your hand to keep the edge round.
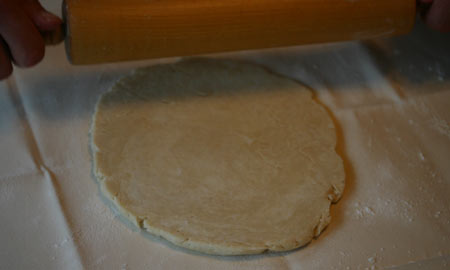
Rub flour over your rolling pin and begin rolling. Always roll from the center of the dough out, lifting the rolling pin at the end.
Think of a clock face and roll the dough from the center to 12 o’clock. Start back at center and roll to 2 o’clock then to 3 o’clock and so on all around and back to 12 o’clock.
Your goal is to make your dough the same thickness throughout, between 1/16 and 1/8 inch thick. If the edges split, use your fingers to push the egdes together.
If the dough begins to stick to your rolling pin, rub some flour on the rolling pin.
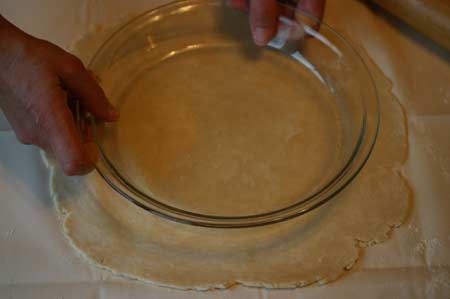
Use your 9 inch pie plate as a guide for size. Roll the bottom dough a good inch wider than the pie plate. The dough needs to be big enough to come up the sides of the pie plate.
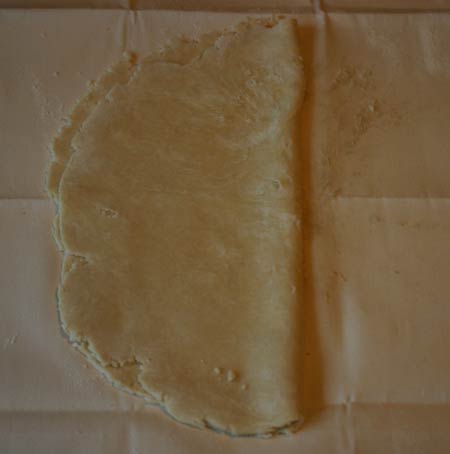
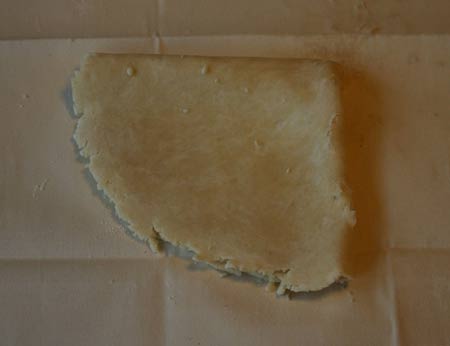
When the dough is the correct size, grab the pastry cloth and fold it over onto itself so that you are folding the dough into a half circle.
Peel back the pastry cloth carefully. You should be looking at a half circle of dough. Carefully pick up the cloth and fold the dough into quarters.
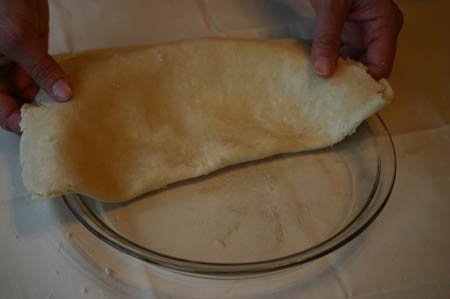
So in other words you fold the dough in half and in half again. This makes it easier to transfer it to the pie plate.
Pick up the dough and place it into the pie plate so that it covers half of the plate.
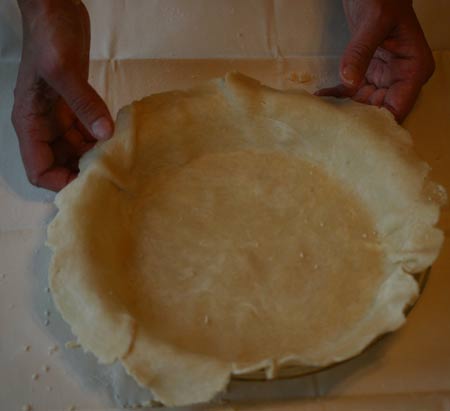
Now open the pastry so that it covers the whole plate. Ease the dough down into the plate being careful not to stretch it into the bottom and up the sides.
If the dough hangs over the edge of the plate more than an inch, trim it off using your fingers or kitchen scissors.
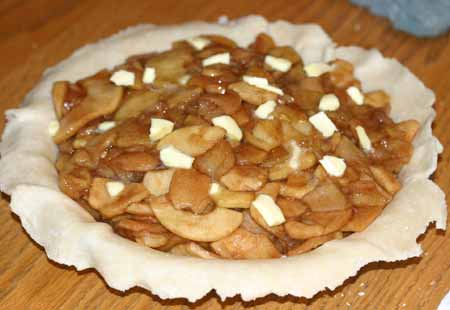
Add the cooked apple mixture to the dough. Mound the mixture up in the center of the pie.
Dot with butter, say a tablespoon or two worth on the apples.
The Top Crust For the Apple Pie Recipe
Take your second pie dough that was covered in the bowl and roll it out the same as above. Make sure the dough is a little larger than the pie plate.
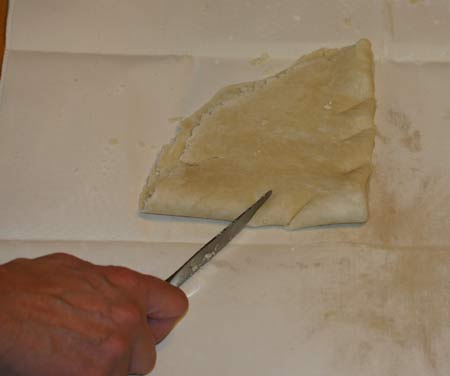
Fold the dough into quarters just like before, only this time take a butter knife and make three 1 inch slits one inch apart in the folded ends of the dough. These slits allow steam to escape. Also don’t cut the slits too close to the edge of the pie as pie juice will leak out.
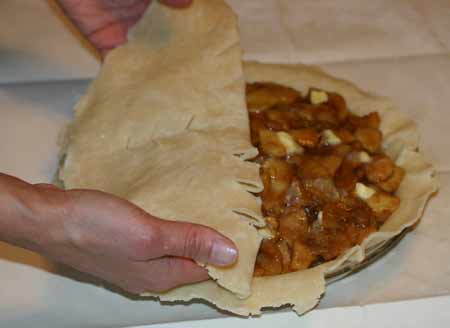
Unfold the dough so that it is only folded in half. Carefully place the dough on one half of the pie so you know that the edges will be covered. It is difficult to move the dough once you place it.
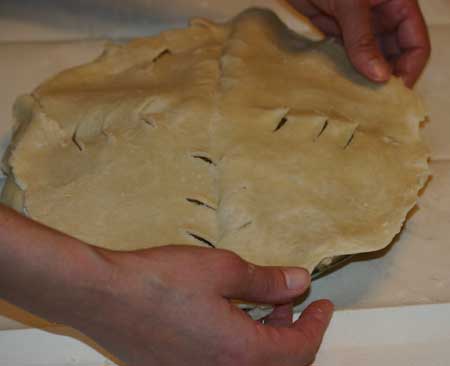
Unfold the other half and the whole pie should be covered.
Ideally the top crust should be a little bigger than the bottom. You can trim it.
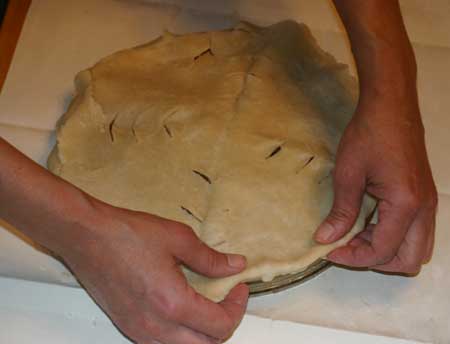
If the top crust hangs over the edge of the pie more than an inch trim with your fingers. Seal the edge of the pie by tucking the top crust under the bottom crust to seal the edge and keep the juices in.
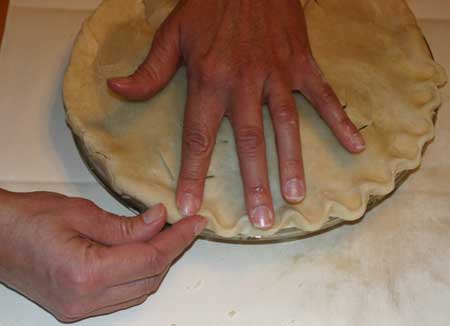
Place your index finger and thumb of one hand, like you are measuring 1 inch, at the edge of the crust facing towards the center of the pie.
Now take the index finger of your other hand and place it so you are pushing the dough between the finger and thumb of the other hand.
This hand formation is how you will flute the edge of your pie. Go around the whole edge of the pie, squeezing and pinching.
Let’s Bake That Apple Pie Recipe
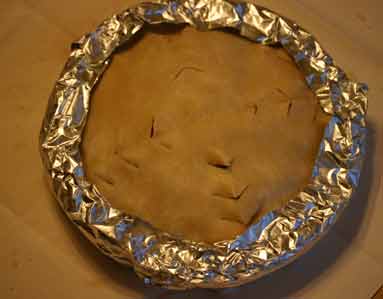
Place 2 inch wide strips of foil around the edge of the pie. This area of the pie always tends to get more done before the rest of the pie is cooked.
Put the pie on a cookie sheet in a 425 degree F oven. Cook for about 50 minutes total.
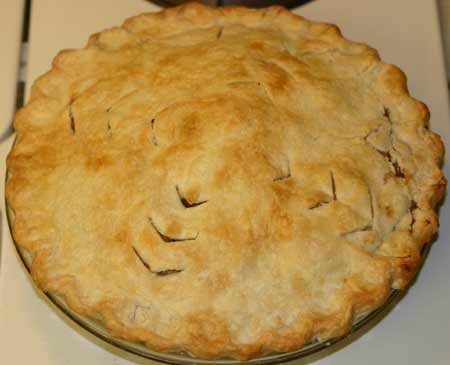
Remove the foil strips after the first 30 minutes so that the edges will brown nicely. Bake till pie is a nice golden brown.
This apple pie recipe is sensational served warm topped with vanilla ice cream a la mode.
You and your family will love the aroma that fills your house and the taste that will more than satisfy your tastebuds.
Remember at the beginning of this apple pie recipe I mentioned a secret to pie making was cooking the apples first? Check out how many apples are in this pie and there is no space between the upper crust and the filling. Sweet.
I hope this how-to-make an apple pie recipe page was helpful to you.
Now go ahead and try your hand at pie making. I’m confident you will make this apple pie recipe more than once.
So give it a try. You can do it. It’s easy as pie. 🙂
Click here to watch my Apple Pie video.
Click here for more delicious dessert recipes.


